Cozy, Spicy, Tasty Pumpkin Bread

20131214-101713.jpg

Kitchen Helper

With 2 jars of leftover, homemade, organic pumpkin puree in the freezer, and a light snow falling outside, it was time to make the pumpkin bread.
Along with my little helper, we scoured the internet for recipe ideas, alighting on 3 that looked good, but not quite right. So, taking some liberties, I combined the best points of each recipe, keeping healthy ingredient options in mind,  along with availability in my pantry (no one is going shopping at 7 AM on Saturday morning!) and developed the recipe below. We found inspiration on Cooking Light and Food52 (a personal favorite for recipe ideas).

20131214-101818.jpg

Cozy, Spicy, Tasty Pumpkin Bread

I liked the idea of a spiced pumpkin bread, since oftentimes fruit and vegetable quick breads can be indistinguishable. I remember my son calling the zucchini bread I made this summer banana bread. Blame it on him being a 3 year old, but he was on to something. So, I heavied up on spices in this recipe, resulting in a great aroma in the kitchen and a more flavorful, distinctive bread.

Instead of using 100% white flour, as many recipes suggest, I incorporated whole wheat and rye flours as well. The different flours add texture to the bread, and some would argue, slightly improve the nutrition profile. I substituted coconut oil for vegetable oil, which is found in most recipes. Coconut oil is nutrient-dense, adds another layer of flavor, and is a perfect substitute for any oil or butter. If you’re interested in how coconut oil can keep you healthy this winter cold season, read here. Plus, I had it in my pantry. Also, I used only a cup of sugar, reduced from 1 1/4 sugar in most recipes. But, I am not positioning this as a super-healthy, virtuous recipe. Just a tasty one, that’s also fun to do with little kids.

Cozy, Spicy, Tasty Pumpkin Bread Ingredients

  • 3/4 cups all-purpose flour
  • 1/4 cup rye flour (you can substitute with all-purpose flour if you do not have on hand)
  • 1/4 cup whole wheat flour (you can substitute with all-purpose flour if you do not have on hand)
  • 1 1/2 teaspoons baking powder
  • 1/2 teaspoon ground ginger
  • 1/4 teaspoon ground cardamom
  • 1 teaspoon ground cinnamon
  • 1/2 teaspoon ground nutmeg
  • 1/4 teaspoon ground cloves
  • 1/2 teaspoon salt
  • 3/4 cup packed dark brown sugar
  • 1/4 cup granulated sugar
  • 2 large eggs, lightly beaten
  • 1 cup pumpkin pumpkin (homemade or canned)
  • 3 tablespoons softened coconut oil (can use canola oil or vegetable oil instead)
  • 1 1/2 teaspoons vanilla extract
  • Butter to grease pan
  • Handful of chopped walnuts (optional)

Preheat oven to 350°. Grease 1 loaf ban with butter.

Combine flours, baking powder, spices, and salt and sugars in a large bowl; make a well in center of mixture.
20131214-101846.jpgCombine eggs in a medium bowl, stirring with a whisk. Add pumpkin, oil, and vanilla; stir well. Add to flour mixture, stirring just until moist. Spoon batter into loaf pan. If using, sprinkle walnuts on top of bread. Bake at 350° for 60 minutes or until a wooden pick inserted in center comes out clean. Cool 10 minutes in pan on a wire rack, and remove from pan. Cool completely on wire rack.

Yield: 1 loaf of pumpkin bread


Pie Pumpkin, but no Pumpkin Pie Lovers

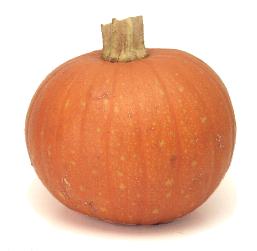
What to do? I picked up an adorable pie pumpkin yesterday at Wolfe Spring Farm, but no one in the household or immediate circle of friends likes pumpkin pie. And, it’s post-Halloween, so how many more pumpkins do I need to decorate the home? Options: Roast, bake, compost, allow to decompose.

Pie Pumpkin

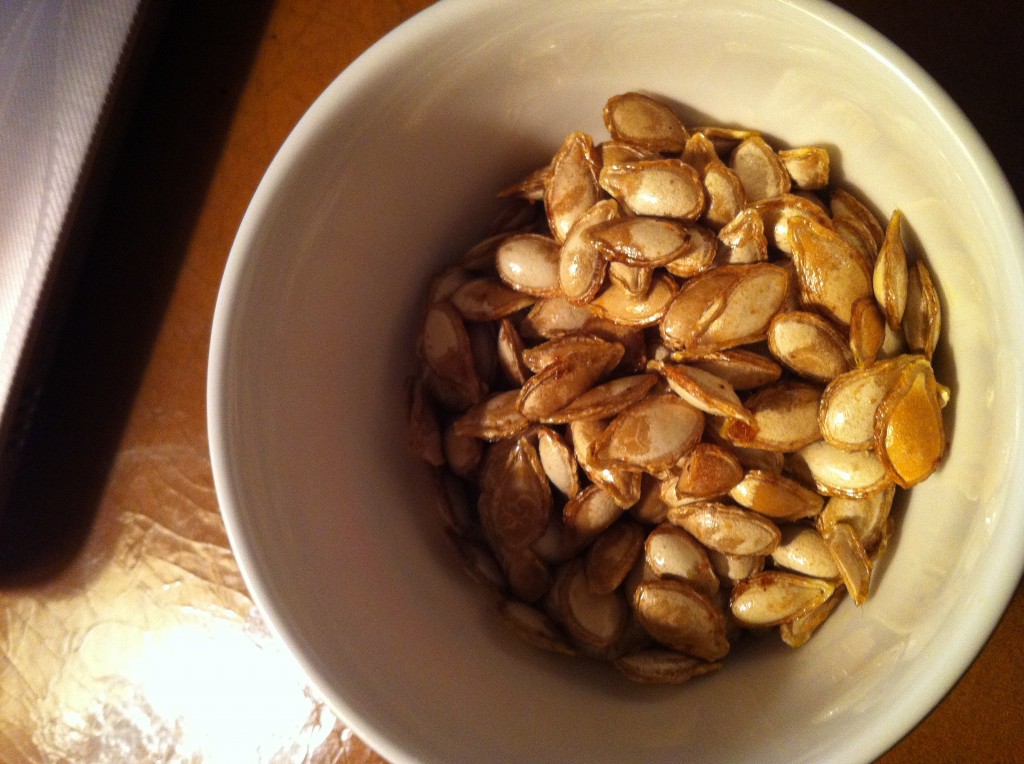
Pumpkin Seeds

Crispy, Spicy Pumpkin Seeds

I opted for roasting since I also wanted to use the seeds inside to make homemade spicy pumpkin seeds, an excellent side benefit of carving or cooking pumpkins. Plus, pumpkin is actually quite healthy. Pumpkin is rich in carotenoids, the compounds that give the pumpkin its bright orange color, including beta-carotene, and Vitamin A, and fiber. What’s not to like?

I had a 2 pound pumpkin, which was pretty manageable to cut open. I started by slicing it in half, and using a soup spoon to scoop out the seeds, reserving them in a separate bowl. I then put my knife to work, slicing the pumpkin into 1″ thick wedges. I mixed up some olive oil, honey and spices and tossed the slices with the mixture on a baking sheet. Popped it in the oven and let them do their thing for a good 45 minutes. And voila! Roasted pumpkin.

Honey Roasted Pumpkin Slices

1 small pie pumpkin
2 tablespoons olive oil
1 tablespoon honey
1 teaspoon ground cumin
1/2 teaspoon cardamom
1 teaspoon kosher salt
dash of cayenne pepper
dash of black pepper

photo (2)

Honey Roasted Pumpkin

Preheat oven to 425 Fahrenheit. On a sturdy cutting board, and using a large chef’s knife, slice off stem of pumpkin and cut pumpkin into 2 vertical halves. Scoop out seeds and flesh with a soup spoon. Set seeds aside in a bowl if you’d like to toast them for a bonus snack (recipe below), or discard. Cut pumpkin into slices vertically (they will look half-moons). Using a spoon or paring knife, remove any additional strings from the flesh.

In a small bowl, mix together remaining ingredients. Place pumpkin slices on a rimmed baking sheet and toss the slices in the the olive oil – honey mixture. Lay slices out on sheet in 1 layer. Sprinkle with an additional pinch of kosher salt and black pepper, and cayenne pepper (if using). Place baking sheet in oven. Roast for about 45 minutes, flipping slices 1 time half-way through the cooking time. Use a fork to see if the slices are tender. They should be lightly browned as well. Peel skin off before serving with a knife or gently remove the flesh by sliding a fork between the skin and the flesh. The pumpkin can be served warm or at room temperature, and will last 3 – 5 days in the refrigerator. Enjoy!

Crispy, Spicy Pumpkin Seeds

Raw pumpkin seeds
1 tablespoon olive oil
sprinkle of cayenne pepper
1/2 teaspoon ground cumin (or any other spices that you like
Kosher salt and black pepper

Preheat oven to 325 Fahrenheit. Assuming you are using the pumpkin seeds from your recently carved or sliced pumpkin, you’ll need to spend a few minutes cleaning up the seeds. This is arguably the most pain-staking part of the recipe. Place the pumpkin seeds in a wire mesh strainer and remove any large chunks of flesh. Then rinse the seeds under running water, making sure that you’ve removed any visible flesh and the seeds are clean. Then place seeds on a paper towel and dab them to remove excess water. They don’t have to be bone dry. I usually use 2 paper towels for this, no more.

Mix remaining ingredients. Like the recipe for roasting the pumpkin slices, place the seeds in one layer on a rimmed baking sheet (I was using my one rimmed baking sheet, so I used a pizza pan instead). Pour the olive oil mixture over the seeds and use your hands or a spoon to coat them evenly if possible. Bake for 10 minutes. Remove from oven and give pan a shake and stir around the seeds. Return to oven for another 10-15 minutes. The seeds are ready when they are lightly browned. Some may get darker, which is just fine. Taste for doneness. Allow to cool and then place in sealed container. They will last for about a week at room temperature. Enjoy your healthy, homemade snack!

Inspiration for Sunday Brunch: Spanish Tortilla and Crisp Winter Salad

Spanish Tortilla & Escarole Salad

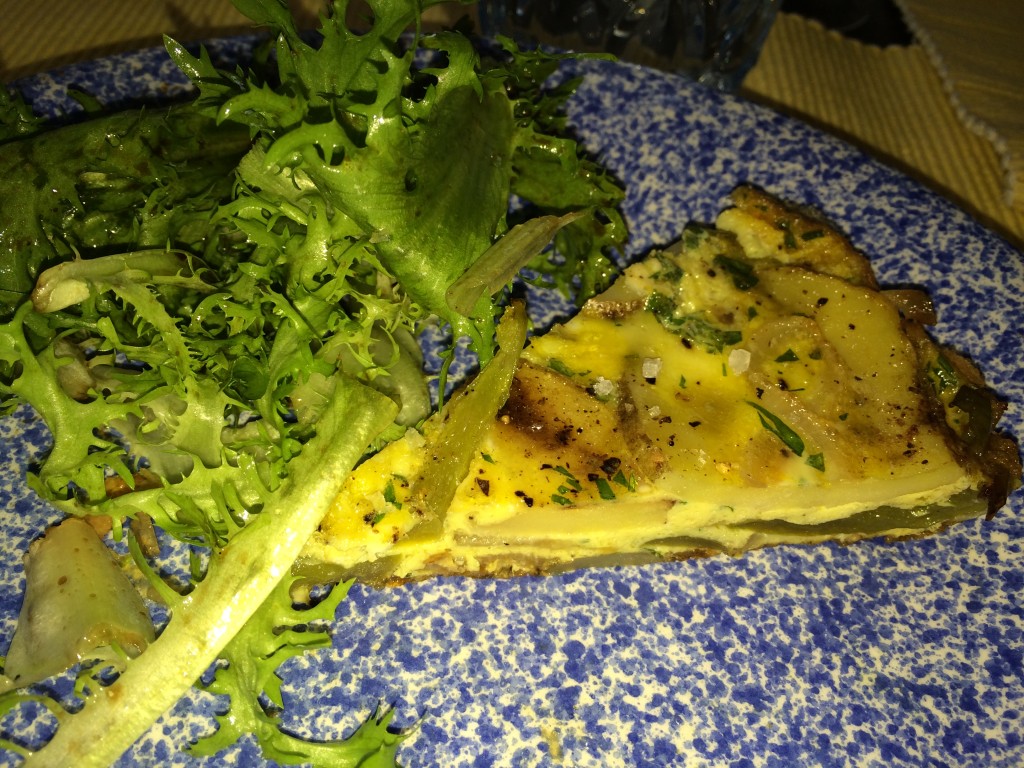
Spanish Tortilla served with Escarole Salad

I must give credit where credit is due. This meal was largely Hubs’ inspiration. In our penultimate CSA pick-up, we had a carton of freshly dug potatoes and an overstock of bell peppers. Hubs suggested a favorite dish of ours and ran with it: the traditional Spanish Tortilla. Not to be confused with corn or flour tortillas used in Mexican cuisine, the Spanish Tortilla is an egg omelet/frittata-like dish, usually served in wedges at tapas bar all over Spain, or a staple as part of a meal. It is a hearty dish, and really makes a perfect meal on a fall morning. You can serve it warm or cold, and like most of my suggestions, makes for great leftovers.

Last Sunday morning,  as soon as breakfast was over, Hubs got straight to work on the tortilla.  It does take some prep work, but as I mentioned, it is not a one meal wonder. The beauty of preparing the tortilla in the morning is that we had our lunch ready to go and waiting for us when we came in after a brisk fall walk. All I had to do was prepare the salad. We had a large bag of curly escarole, so I made a simple balsamic vinaigrette and served it on the salad. The slightly bitter, crispy crunch of the escarole was a perfect side for the egg and potato tortilla, served room temperature. I hope this meal inspires you, too. And props to Hubs.

Tortilla Espanola
 (adapted from Mark Bittman’s Spanish Potato Omelet recipe in How to Cook Everything)
Spanish Tortilla

Spanish Tortilla

1/3 cup olive oil
1 pound yukon gold or other white potato, sliced 1/8″ thick (you can peel if you wish)
1 onion, sliced
1 red or green bell pepper, washed and sliced thinly (optional)
1-2 cloves garlic, minced
6 large eggs
1/4 cup fresh parsley, chopped
salt and pepper

Using a 10″ cast iron pan, or other oven-proof pan or skillet, heat about 1/2 the olive oil on the stove top over a medium flame. Add the potatoes slices and season with salt and pepper. Cook for about 20-25 minutes, turning the slices every few minutes. They are ready when softened and slightly browned. Remove with a slotted spoon and set aside.

Preheat the oven to 375 degrees F. Add remaining oil to pan, warm for a minute, then add the pepper and onion. Saute for about 10 minutes until the vegetables are softened. Then add the garlic and cook for another 5 minutes. Return the potatoes to the skillet and reduce heat to medium-low. Cook the potatoes, peppers and onions together, turning occasionally for another 5 minutes or so.

Beat the eggs, add salt and pepper and the parsley. Reduce the flame to low and slowly pour the eggs over the potato mixture. Shake the pan to distriubte the eggs evenly and leave undisturbed for about 5 minutes. Once oven is hot, transfer to oven and bake for ~10 minutes. The tortilla is ready when the mixture is set on top. Remove from oven and allow to cool. Flip onto serving dish, or remove carefully with spatula. Serve warm or at room temperature.

Truly Tasty Kale Salad: Hubs Approved

Hello Friends,

It has been far too long since my last post and I have missed you. I have been keeping some real keeper recipes from you these past few months, and I apologize for that. Let me start with the Truly Tasty Kale Salad. We all know that kale is a superfood, nutrient-dense and packed with antioxidants.

Courtesy of UNH

Kale Salad Infographic

We are supposed to devour it by the pound to stay young, fit and healthy. But the honest truth is that it is hard to love. You can’t just cut it up and eat it like a carrot or bell pepper, or treat it like a handful of baby greens dressed in a delicious olive oil, balsamic vinaigrette. It requires some effort to make it palatable, and the mere hype factor has caused some to disavow it. I’ve turned it into a snack before, making crispy spicy chips, and used it as a sidebar ingredient in a veggie quinoa salad.

So I truly felt compelled to share this recipe because it features kale front and center. The Truly Tasty Kale Salad has only a handful of ingredients, takes about 15 minutes to prepare and deserves a spot on your dinner table, either as the main attraction, or as a hearty first course. Here’s why: even Hubs likes it. He said so.

3 kale salad tips for you I’ve picked up after perfecting this recipe:

  • Chop up the kale very finely. Abuse it. It can take it.
  • Use more dressing than you would for a normal salad. The recipe below is for 2 servings. You won’t be sorry.
  • Dress the salad and let sit with dressing 10-30 minutes before serving (usually a big no-no as it wilts ALL OTHER PUNY GREENS)

TRULY TASTY KALE SALAD

  • 6 ounces kale, or roughly half a bunch
  • 1/4 cup walnuts (or toasted almonds, hazlenuts if you have on hand)
  • 1/4 cup shredded parmiggiano or pecorino romano
  • 4 tablespoons olive oil
  • 1 1/2 tablespoons white wine vinegar
  • 1 tablespoon smooth Dijon mustard
  • 1 1/2 teaspoons honey
  • Kosher salt and freshly ground black pepper to taste
  • Croutons (optional)

Instructions

  1. Roughly chop walnuts (or almonds or hazelnuts) and lightly toast in a pan for 2-4 minutes until slightly colored and set aside. Don’t leave them unattended – they can burn easily. I speak from experience.
  2. Remove spines from kale by either pulling off leaves from center spine or using a paring knife. I find it easier to rip off the leaves, and then wash and dry leaves. If you have a different method, that’s fine. Once you have clean, dry kale leaves, get out your chef’s knife and start finely chopping the kale. Start by rolling the leaves and slicing it up in a ribbons. Then turn your ribbons 90 degrees and chop some more. You want the kale thoroughly chopped into small squares. Place in salad bowl.
  3. Make the dressing. Combine the olive oil, vinegar, mustard, honey and salt and pepper. Use a whisk to emulsify the dressing. Taste for salt and pepper and adjust as needed. Now you are ready to assemble. Combine the dressing, shredded cheese, nuts and croutons (if using). Toss well. Set aside for at least 10 minutes, more if you have the time. Toss again before serving and enjoy.
  4. Happy eating!

This recipe was inspired by Smitten Kitchen’s Deb Perelman kale salad recipe. She is not one to kowtow to health foods fad, and her writing has yet to fail me. Her new cookbook is the bomb.

Bright, Citrus-y Pepper Pasta

Citrus-y Pepper Pasta

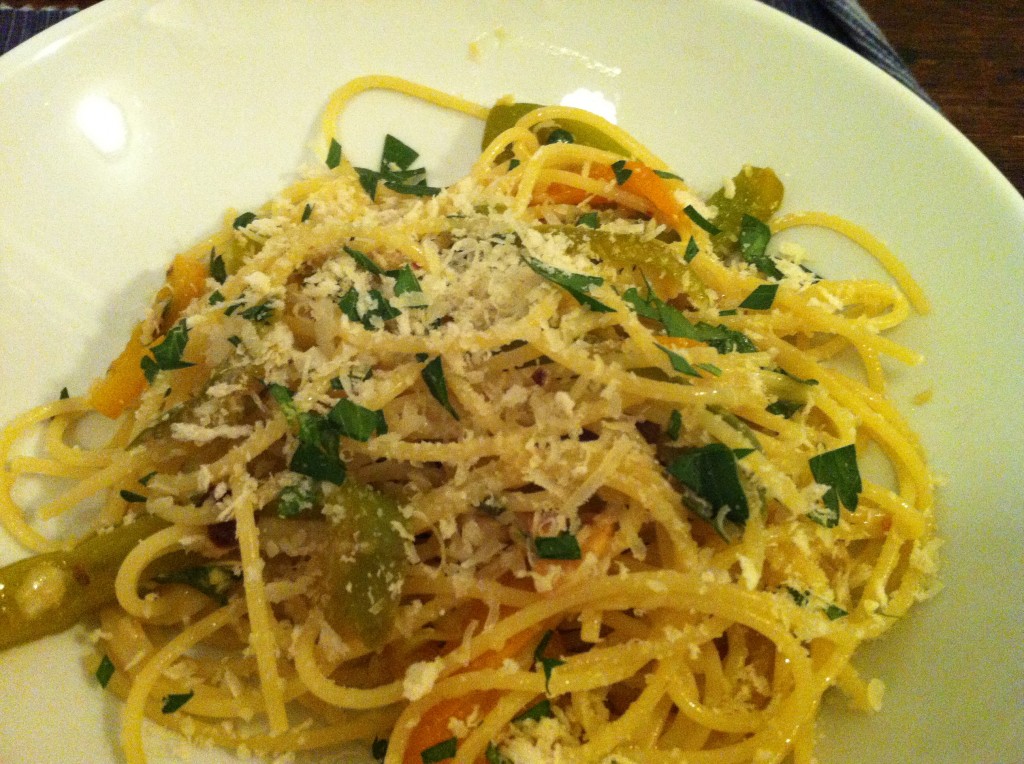
Citrus-y Pepper Pasta to brighten your winter night

In advance of our Oscars party, we revisited a classic recipe, adapted from The Red Cat restaurant cookbook – Spaghetti with Citrus-y Pepper Sauce.
I used

rozen bell peppers from our CSA. And as the peppers are already sliced up, we put this delicious dish together in about 25 minutes.

If you’ve got some peppers in your freezer, try this recipe. For your consideration.

Fermentation Fascination Continues

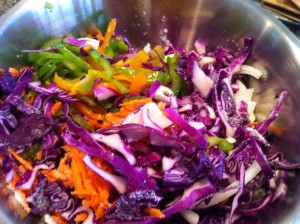
Prepped for the fermentation jars

Good Color: Prepped for the Mason jars

After my first fermentation attempts 2 weeks ago, I was eager to try more. And what are long weekends for, if not fermenting with friends?  And, might I add that my first batch of Slaw was long gone? We consumed all that probiotic yumminess in about a week. Using the simple “add salt and let sit” method, I used the second half of my red cabbage for another batch of Fermented Red Cabbage Coleslaw. This time, I put some elbow grease into it and left the Cuisinart in its cupboard. Here’s my recipe for fast and easy fermented slaw, inspired by Feedmelikeyoumeanit.

Fermented Red Cabbage Slaw

1/2 red cabbage, thinly sliced
1 yellow onion, sliced into rings
1 bell pepper, sliced into thin strips
1 carrot, peeled and shredded
Kosher salt

Special Equipment: Kitchen scale, 2 1-pint mason jars

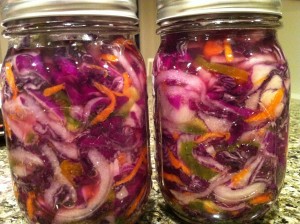
Fermented Coleslaw - red cabbage, onion, bell peppers and carrot

Fermented Coleslaw: red cabbage, onion, bell peppers and carrot

Mix all vegetables in a large, non-reactive bowl. You can use your Cuisinart to chop the vegetables, or simply chop up by hand. Weigh the bowl of vegetables and for every pound, add 2.5 teaspoons kosher salt to vegetables. Mix well. My batch weighed about 3 pounds, so I used ~8 teaspoons of salt. Using your hands, begin to pack the vegetables into a mason jar. After every handful, press down, making space for more. You want to pack the vegetables in tightly, and may be surprised at how much goodness you can fit into one (relatively small) jar. Leave about an 1″ space at the top and seal tightly. Repeat to fill other jar. Set aside in your kitchen on a countertop or pantry for 4-5 days. Taste after 2 days, opening the jar carefully over a sink. When you open, the contents may be bubbling, so do be careful. The slaw is ready when you like the taste of it. It will be sour and crunchy.

Place in the refrigerator and use within 3 months. You will be surprised at how crunchy and tasty the vegetables are (and remain!). Enjoy!

Amazing Everyday Salmon Spice Rub Recipe – One from the Vault

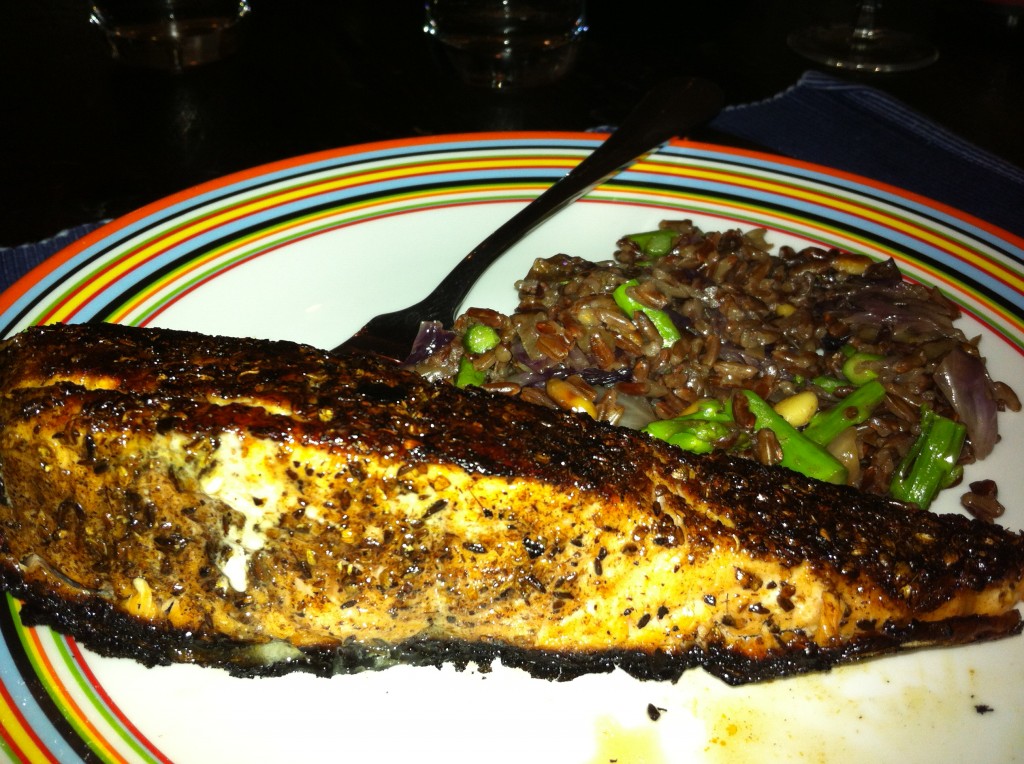
Spice-rubbed Seared Salmon

Spice-rubbed Seared Salmon

Happy day after Valentine’s Day. Perhaps it is my long-term love/hate relationship with Valentine’s Day that caused me to ignore the day itself, but allow me to acknowledge it a day after. Having spent many a Valentine’s Day solo, I learned to downplay, even ignore it, long ago. And once Hubs came around (pre-Hubs moniker days), I was certainly pleased to have someone special to share the day with, but I still couldn’t get overly excited about it. After all, it’s the day-to-day that matters in life, right? So, Hubs and I started a Valentine’s Day tradition – select and prepare a menu together at home. No posh restaurant, no flowers (I wouldn’t turn them down, mind you), but a shared experience, maybe with some candlelight and a bottle of good wine. It has suited us just fine, and we have adapted over the years, too.

While I was researching our menu, I took a peak into the vault and decided to repeat a previous hit.  Spice-rubbed Seared Salmon: it’s a great recipe from either our first or second Valentine’s Day menu. And I love that I found it handwritten on paper, old school style. In fact, this recipe is so simple, I am amazed we thought this was a special occasion dish (guess I cooked a lot less back then than I do now). So, in honoring the love of the everyday, I am sharing this recipe with you now, post-holiday. Try it and let me know what you think

Spice-Rubbed Seared Salmon

  • 1 Tsp. coriander seeds
  • 1 Tsp. cumin seeds
  • 1 Tsp. fennel seeds
  • 1 Tsp. firmly packed light brown sugar
  • 1 Tsp. kosher salt
  • 2 salmon fillets (6-8 oz each) with skin intact
  • 2 Tbsp. olive oil

Instructions

Heat fry pan on medium heat. Add spices and toast 2-3 minutes. Grind spices in spice mill, or use mortar and pestle. Pour into small bowl and add brown sugar and kosher salt to make the rub. Place salmon on a plate and press rub into salmon. Cover with plastic wrap and refrigerate for 1 hour.

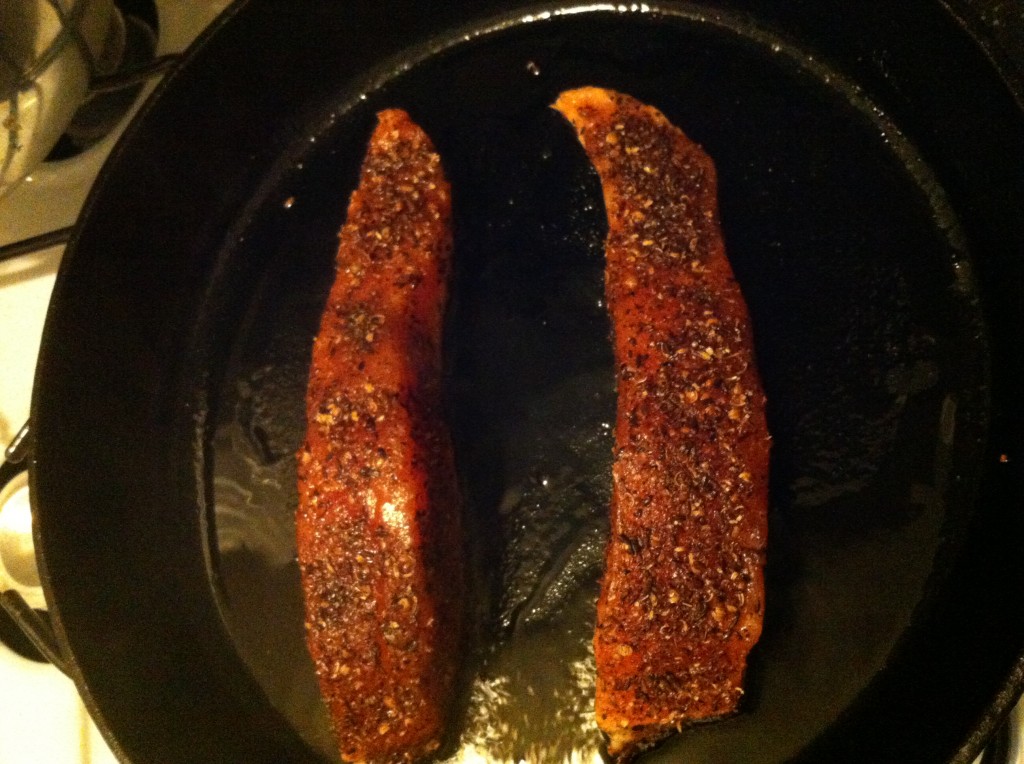
Spice-rubbed salmon searing

Spice-rubbed salmon searing

Preheat oven to 400F. Heat cast iron pan or other oven-proof pan and add olive oil. Heat until smoking, then place salmon skin side down on pan and sear for 4-5 minutes depending on thickness of fillet. Flip salmon gently using tongs (keep skin intact), and place pan in oven. Cook 4-6 minutes until cooked through.

Please don’t wait til next Valentine’s Day to try this!

Coconut Oil is for Eating. Butternut Squash, too.

That’s a declarative statement, recently transformed from a question.

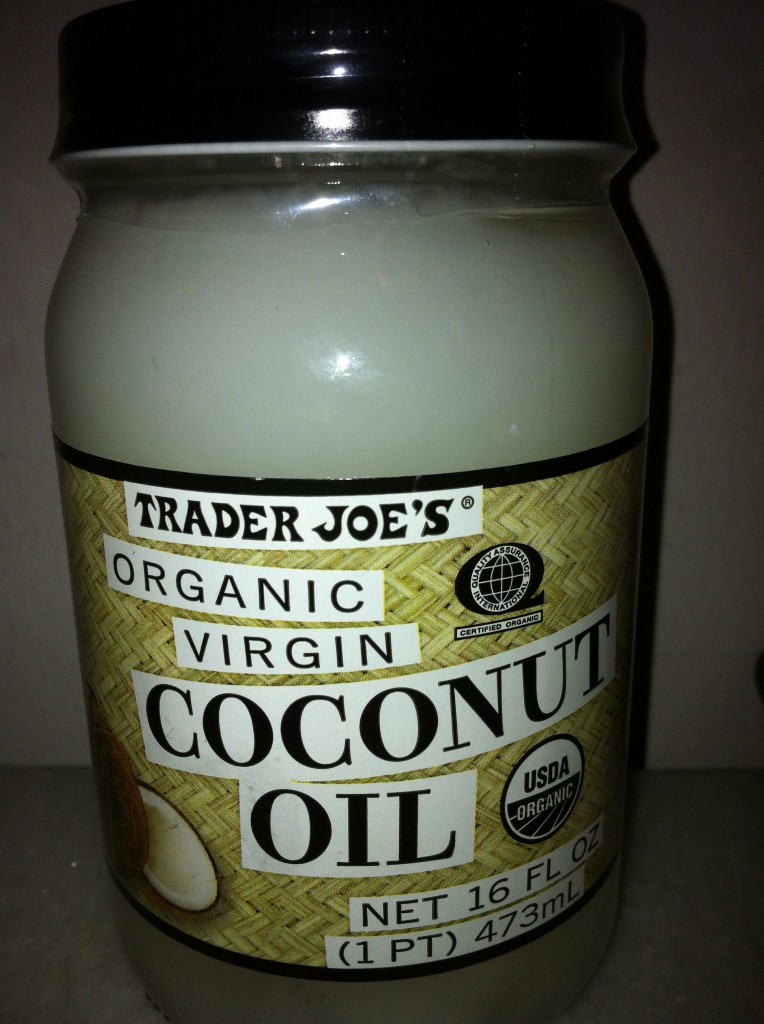
Solid state

Solid state

I found it hard to believe when I started reading  about the health benefits of cooking with coconut oil. It was difficult to comprehend. Firstly, because I still have memories of slathering coconut oil on my body while suntanning in high school (speaking of difficult things to comprehend – did I really do that?), and secondly, isn’t it a  highly processed/hydrogenated fat? Well, turns out I was wrong on both account. I doubt it was real coconut oil I was using back in the day – likely something scented with coconut oil – and coconut oil is really, really good for you. There are people who claim it does everything from reducing inflammation to reversing food allergies. I am not about to make any of those claims here, but I was excited to cook with it because it supposedly tastes great. Incidentally, if you do want to read more on the health benefits, check out Dr. Joseph Mercola’s thoughts on coconut oil’s health benefits from the Huffington Post and fellow food blogger Coconut Mama’s post.

I had read that coconut oil adds secondary flavors of sweetness and nuttiness when used in cooking. That’s what really intrigued me (more so than the health benefits), and it didn’t disappoint. I prepared a simple dish of roasted butternut squash and was super excited to crack open my jar of Trader Joe’s Coconut Oil. I was a little alarmed at first to see the coconut oil in a solid state, looking more like marshmallow fluff than a fat to roast my veggies with. But it scooped out easily and started softening within seconds, without any supplemental heating. And, oh, the scent. My kitchen and entire apartment smell heavenly – even luscious – while we await the snowstorm of the season. Here’s my simple recipe testing out the new wonder ingredient – coconut oil.

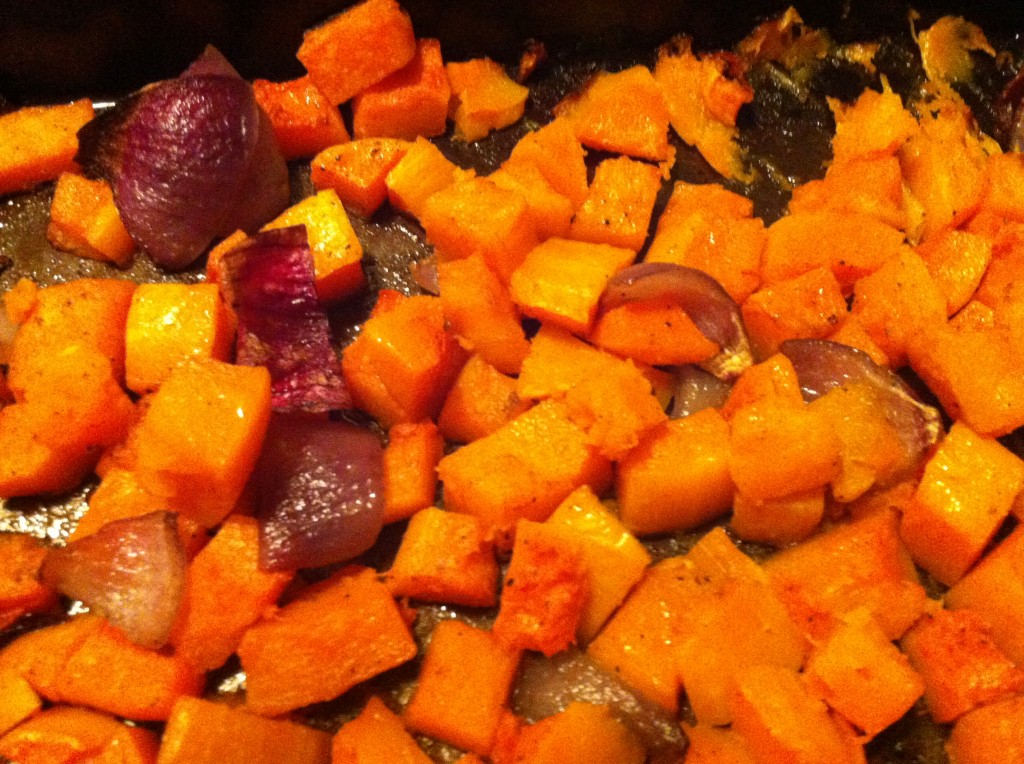
Butternut Squash Roasted in Coconut Oil, with Roasted Red Onion

Butternut Squash Roasted in Coconut Oil, with Roasted Red Onion

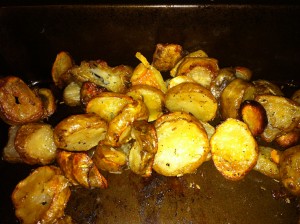
Butternut Squash Roasted in Coconut Oil

IMG_3314[1]

Ready for the oven. Dab of coconut oil, salt and a sprinkle of cheyenne pepper

1 medium butternut squash, peeled and roughly cubed into 1″ cubes (save the seeds for roasting, too)
1 Tbsp coconut oil
1 red onion, peeled, quartered, and cut into large chunks (optional)
large dash of kosher salt

Preheat oven to 400 degrees. Toss butternut squash and onion, if using, with coconut oil in 9X11 baking dish. Sprinkle salt and toss again. Place in oven and roast for 30 – 40 minutes, shaking pan every 10 minutes or so. Check for doneness – the squash should be tender and you should be able to easily spear it with a fork.

I used the onion because I actually had 1/2 an onion hanging around in my fridge. It is not essential, but added some nice color. Enjoy the tastes and aromas!

Healthy, homemade snack

Healthy, homemade snack

Sunchokes, Anyone?

Sunchokes courtesy of TheKitchn

I am mildly obsessed with this late fall tuber – the sunchoke, aka Jersusalem artichoke. Sunchokes are super tasty, easy to prepare, contain protein (!!) and low in starch. They could easily be mistaken for ginger root in appearance, but have a consistency more like celeriac or a potato (with a much better nutritional profile). And, they are available now in the Northeast, so local+seasonal. I guess I commented one too many times during dinner on my affection for this veg.  Said Hubs, ” Yeah, I got it,” all the while scraping his plate clean. This is one in a series on the lovely sunchoke.

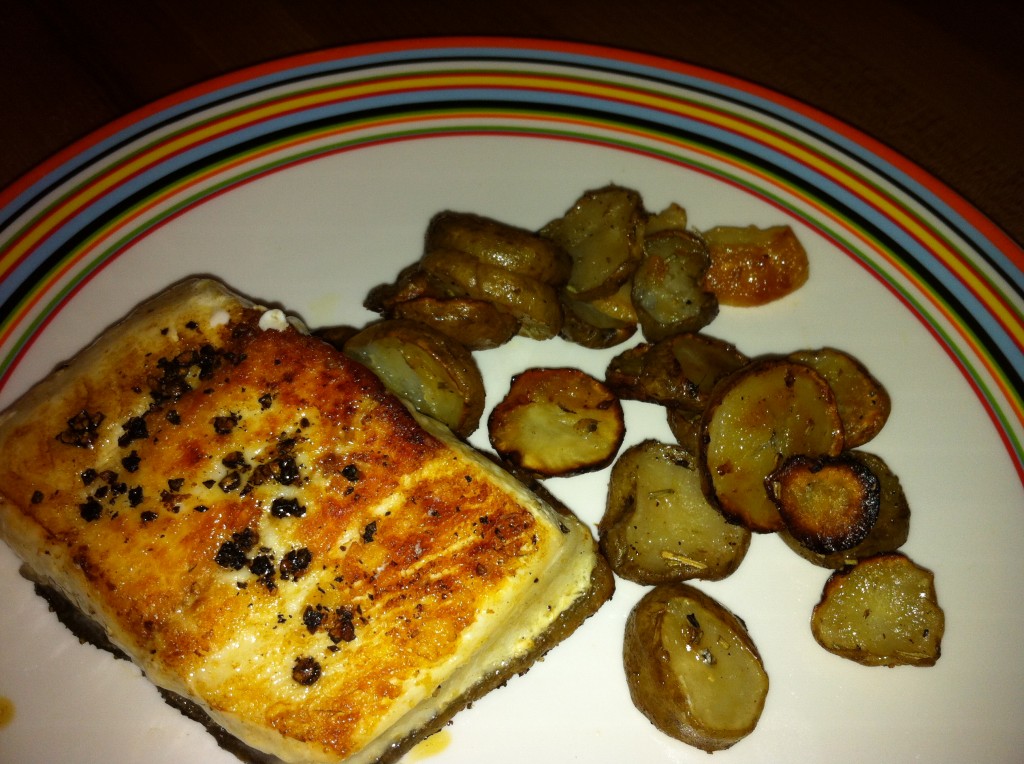
Last Monday night’s meal consisted of Pan Seared Halibut with Oven Roasted Sunchokes and a mixed green salad to finish. It was a hit.

Pan Seared Halibut and Oven Roasted Sunchokes

I wanted a simple recipe for the halibut, and I got my inspiration from the the King Estate Winery’s website. I cracked a handful of peppercorns, and then pressed them into each side of 6 ounce halibut fillets, along with a sprinkle of kosher salt. I heated up a splash of olive oil in my cast iron pan on medium heat, and then seared the fillets for about 2 minutes on each side. Done.  I had previously prepared the sunchokes, so dinner was basically ready to go in less than 10 minutes. Here is my recipe for the sunchokes. Must try

Oven Roasted Sunchokes for 2

Oven Roasted Sunchokes

1/2 to 3/4 pound of sunchokes, scrubbed and slice 1/4 inch thick. Do not peel
2 or 3 tablespoons olive oil
5 or 6 cloves of garlic, peeled and smashed
1 teaspoon dried rosemary, or a small sprig of fresh rosemary, if you have it
Kosher salt
Freshly ground pepper

Heat oven to 425F. Toss sunchokes in a mixing bowl with olive oil, garlic, rosemary, salt and pepper. Place in a 9X13 roasting pan and cook for 15 minutes. Shake the pan once or twice. The sunchokes are ready when they are softened and lightly browned. You can keep them in the oven longer if you’d like to get them a little crispier. Enjoy!

Reliving the Glory of Summer – Pasta al Pesto Genovese in the Fall

Post-Thanksgiving Pasta – Sounds like a bad idea, right? I am a few weeks late with this post, but I hope you will still find it entertaining.

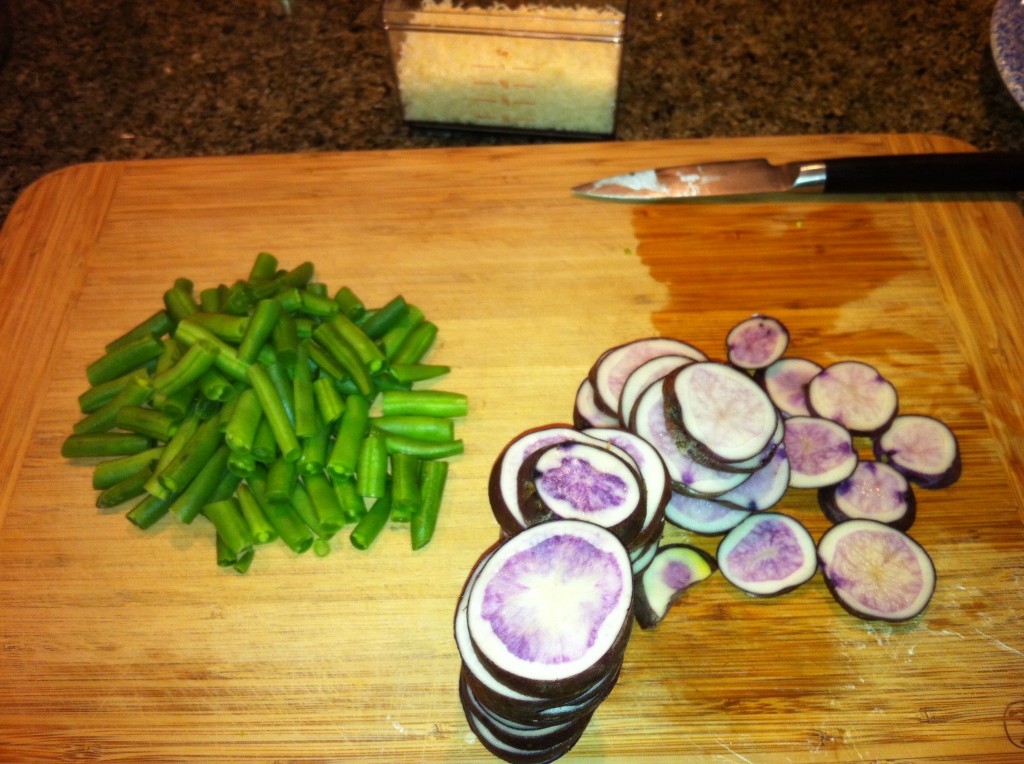
Pretty Purple Taters and Green Beans Ready to go

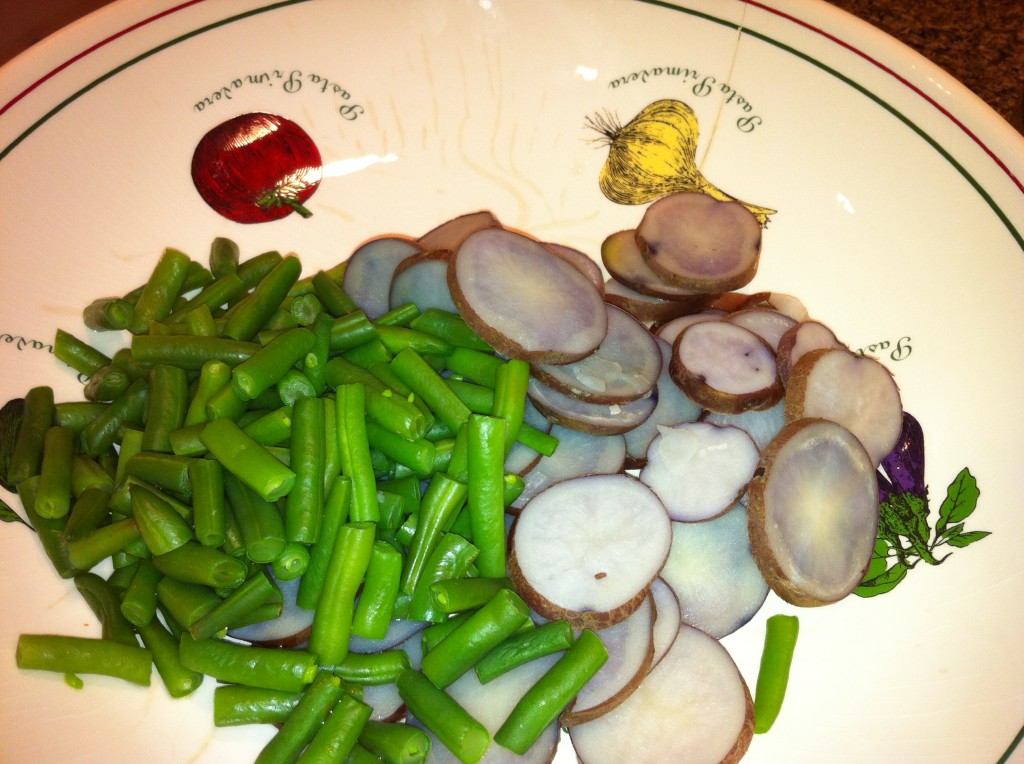
Pasta al Pesto was great excuse to reminisce about the summer’s bounty.  And required no additional shopping – a bonus after hitting the grocery store multiple times while prepping for Thanksgiving. I pulled a glass jar of pesto out of the freezer Saturday morning to defrost, excited for my resourceful quasi-pantry meal. We had purple potatoes leftover from the last CSA pick-ups (remember, potatoes do last), and the green beans, while neither local or seasonal at the moment, were leftovers from Thanksgiving dinner. We cleaned and sliced them up, and boiled the potatoes first, then the green beans, using the same water.

Boiled potatoes and green beans, awaiting their turn

Set aside the veggies, then cook the pasta in the same water. While the pasta cooked, I thinned out my frozen pesto with some additional olive oil, and added 1/2 cup of grated parmiggiano to the pesto. If you prepare pesto for the freezer, don’t add the cheese until you are ready to use it.

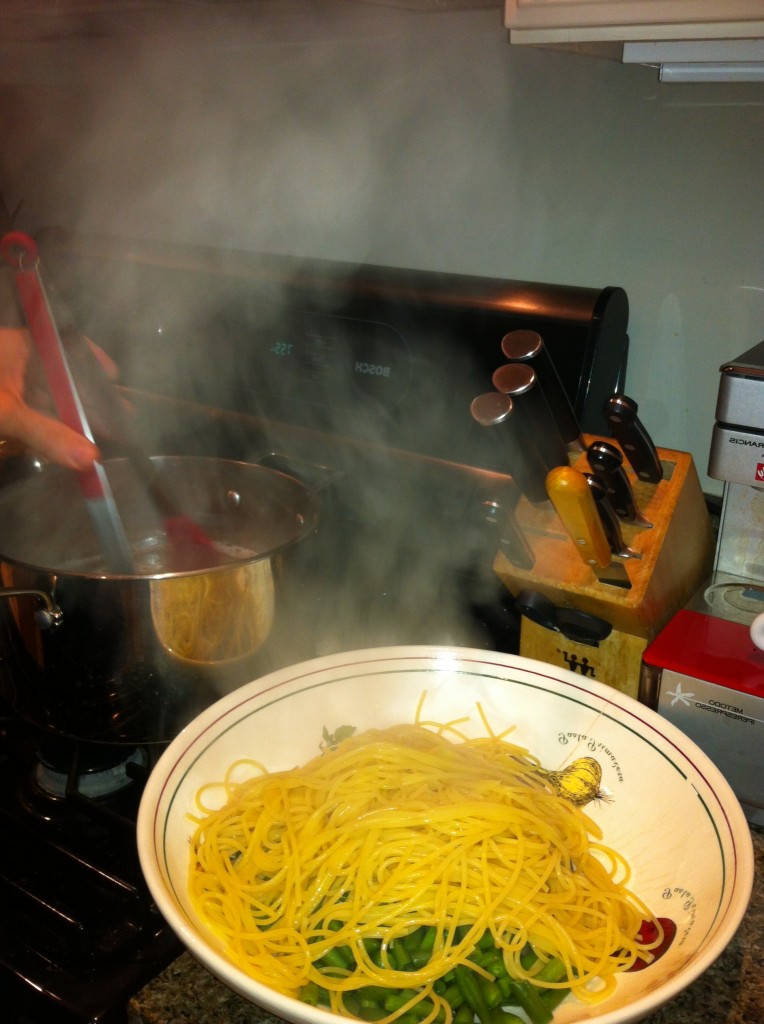
Add the spaghetti, steaming, straight from the pot

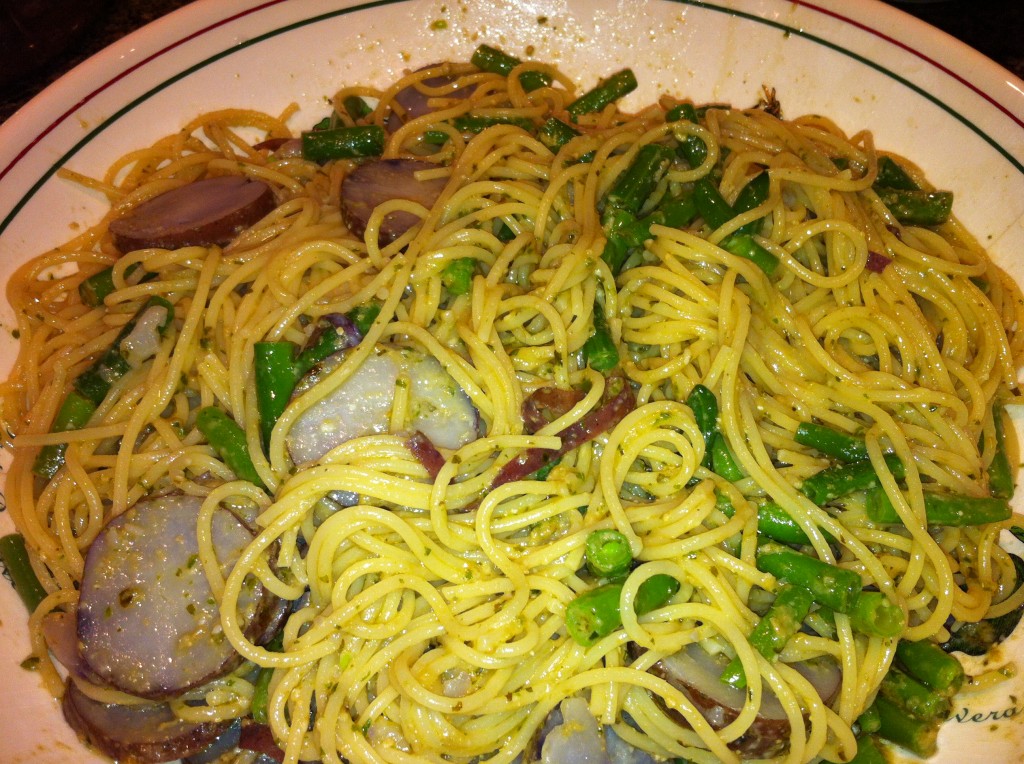
Add the pasta to a large bowl with the green beans, potatoes, pesto and a splash of pasta water. Toss well.

Fabulous Fall Meal: Spaghetti al Pesto Genovese

Tutti a tavola! Spaghetti al Pesto Genovese on a chilly November night. I loved dipping into my pantry to pull out previously prepared treats.

Tell me what you’ve used from  your pantry lately.