Spaetzle 2 Ways for a Fall Sunday Dinner

As the weather turns cooler, we are all in search of cozy, comfort foods. What better excuse to make a hearty (read: carb packed) meal with your family? For years, I have known that Hubs has a soft spot for spaetzle, the Germanic noodle/dumpling. I have heard tales of family lore, making spaetzle for holidays and other special occasions. We even received a spaetzle maker as a Christmas present some years back.

Spaetzle maker

I admit here (with some embarrassment) that it remained wrapped and unused until last Sunday. As you know, I prefer to prepare meals based on nutrient-dense foods, high in protein, complex carbs, vegetables, grains and the like. Spaetzle vehemently does not meet any of these requirements. It is made from a basic dough of flour and water (or milk), and often dressed with butter or gravy. But with inspiration from the NY Times’ Melissa Clark, and a devil-may-care attitude about my waistline  (I am in the 3rd trimester of my pregnancy), it was time to make the spaetzle.

IMG_4253[1]

Knoffli recipe

We agreed that Hubs would be in charge of the spaetzle preparation. Hubs consulted the Cassellini family cookbook, a collection of recipes from Hubs’ maternal grandmother and her family, which has the classic family recipe, actually spelled “knöfli.”IMG_4252[1] He decided to test Melissa Clark’s updated recipe, which used rye flour, in addition to white flour, and also whole milk, in place of water. We thought this would produce a more flavorful noodle. Once the spaetzle were ready, we’d each prepare our own dish using the spaetzle base. I was going to adapt Melissa’s recipe, which incorporated cabbage and leeks (vegetables!! yay!) and Hubs would go a more traditional route. Plus, cabbage is rich in fiber, anti-oxidants and anti-inflammatories. We would re-join at the dinner table and sample both for our Sunday night dinner. Keep reading for our recipes

Basic Spaetzle recipe
Adapted from Melissa Clark’s Rye Spaetzle recipe

1 teaspoon kosher salt, more as needed
180 grams all-purpose flour (1 1/2 cups)
100 grams rye flour (3/4 cup)
2 large eggs, lightly beaten
1 to 1 1/2 cups whole milk, as needed

IMG_4214[1]

Using the Spaetzle maker

Bring a large pot of salted water to a boil. In a large bowl, whisk together the flours and 1 teaspoon salt. In a separate bowl, whisk together the eggs and 1 cup milk. Make a well in the dry ingredients and pour in the wet mixture. Stir with a wooden spoon to combine. The consistency should be that of a sticky cake batter. As the batter sits, it will absorb more liquid; add more milk as needed to keep it loose.
Working in batches, press the spaetzle through a spaetzle maker or a colander into the boiling water. (If using a colander, either hold it with oven mitts so you don’t burn yourself over the steaming water, or get a friend to help). As the spaetzle rise to the surface, scoop them out with a slotted spoon and transfer to a bowl.

Toss spaetzle with butter or olive oil and serve as a side dish. Or, choose one of the following preparations.

Cabbage & Leek Spaetzle Gratin
adapted from Rye Spaetzle Gratin With Savoy Cabbage and Caraway

1/2 batch of  Basic Spaetzle recipe (above)
1 small-medium green cabbage (1 1/2 pound)
3/4 teaspoon whole caraway seeds
4 tablespoons unsalted butter
3 large leeks, thinly sliced (3 cups)
2 garlic cloves, finely chopped
Large pinch chile flakes
1 thyme branch, or 1 teaspoon dried thyme
2 teaspoons apple cider vinegar, or more to taste
1 3/4 teaspoons kosher salt, more as needed
1/2 cup Gruyère or Emmentaler cheese, grated
Ground black pepper
Kosher salt

Preheat the oven to 425 Fahrenheit. IMG_4216[1]Discard the outer leaves of cabbage; quarter, core and slice the rest. Using a mortar and pestle or the flat of a knife, lightly crush the caraway seeds. Melt the butter in a very large skillet over medium-high heat. Add the leeks and cook, stirring occasionally, until tender and lightly colored, 5 to 10 minutes. Stir in the caraway, garlic, chile and thyme; cook 1 minute. Add the cabbage and cook, tossing frequently, until very tender and wilted, 7 to 10 minutes. Season with vinegar and 3/4 teaspoon salt or more to taste. Remove from heat and cover to keep warm.

IMG_4218[1]Add the spaetzle to the pan and toss well. Scrape the mixture into a 1 1/2-quart gratin dish. Scatter cheese over the top. Bake until golden and bubbly, 20 to 25 minutes. Grind a generous amount of black pepper all over the top of the gratin, then serve.

YIELD 6 to 8 servings

Classic Spaetzle with Sauteed Shallots

1/2 batch of  Basic Spaetzle recipe (above)
1 shallot, chopped finely
2 tablespoons butter
Black pepper and salt, to taste

Melt butter over medium low heat. Add shallots and saute for 3-4 minutes until slightly colored, but not browned. Add spaetzle and toss to coat. Cook for another 2-3 minutes, and add freshly ground black pepper and salt to taste. Serve and enjoy.

Results

IMG_4219[1]

Cabbage & Leek Spaetzle Gratin

IMG_4220[1]

Spaetzle with Sauteed Shallots

Both recipes tasted delicious. I cannot tell a lie, they really hit the spot for comfort food on a chilly fall night. The cabbage and leek gratin was very tasty. I used about 1/2 the amount of spaetzle called for in the original recipe, so it made for a looser and lighter gratin. It still felt rich and hearty, but not so heavy. Even Hubs admitted it had good flavor. I sampled the classic spaetzle preparation, and admitted it, too, was delicious. The rye flour used in the recipe also gave the noodles more bite and flavor, as suspected. We wholeheartedly recommended the updated recipe to Hubs’ family, even if some called it blasphemous.


What’s for Dinner? Charmoula-Rubbed Mahi-Mahi Never Said Anyone

Charmoula-Rubbed Mahi-Mahi and Shallot Bulgur. Courtesy of Bon Appetit

Looking for a fast, healthy and tasty weeknight meal? This is it, and don’t be put off by the unfamiliar spice concoction. Charmoula-rubbed Mahi-Mahi  is easy peasy, especially when paired with Shallot Bulgur. You must be thinking that I am on a spice-rub kick. ‘Tis true. This recipe, likes others from the so-called cleanse, took me out of my cooking comfort zone, requiring the use of unusual spices and various healthy, whole grains…like bulgur! How exciting – I had not prepared bulgur before, so it was great to discover another high-fiber whole grain, easy to prepare and even Hubs-approved. Sara Dickerman pairs the Mahi Mahi with a sliced orange salad. Visually, it is a treat (see below), but really not worth the effort. It makes the whole meal more complicated to prepare, and I suggest skipping it in lieu of a sliced orange for garnish.

Charmoula-Rubbed Mahi-Mahi

  • 1/2 cup finely chopped fresh cilantro, or parsley (I used parsley since I had it on hand)
  • 1/4 cup olive oil
  • 1/2 teaspoon ground cumin
  • 1/2 teaspoon paprika, sweet or smoked
  • 1/2 teaspoon kosher salt
  • Juice of 1 lime
  • 1 small garlic clove, grated
  • 4 6-oz. mahi-mahi fillets

Instructions

  • Stir together cilantro or parsley, oil, cumin, paprika, salt, lime juice, garlic, and 1 Tbsp. water (alternatively, pulse ingredients in a food processor for a smoother texture and a slightly more intense herbal flavor). Rub mixture onto the mahi-mahi fillets and chill for at least 15 minutes and up to 1 hour.
  • Preheat oven to 425°. Place marinated fish on a rimmed baking sheet. Roast until fish is just opaque in center, 10–15 minutes.

Read More http://www.bonappetit.com/recipes/2013/01/charmoula-rubbed-mahi-mahi#ixzz2LdItTwnO

Poached Eggs in Tunisian Red Pepper Sauce Sounds Better Than Green Juice

Poached Eggs with Tunisian Red Pepper Sauce & Chickpeas with Leeks, Spinach and Smoked Paprika. Courtesy of Bon Appetit

And it looks and tastes a heck of a lot better, too. This is post #2 in my series on the “So-called Cleanse” for food lovers. I found this dinner recipe mid-way through the 2 week menu from Bon Appetit’s Food Lover’s Cleanse and fell in love.  High-protein, vegetarian, healthy: Poached Eggs with Tunisian Red Pepper Sauce & Chickpeas with Leeks, Spinach and Smoked Paprika. I have already prepared this meal 3 times, sometimes with the accompanying chickpeas, sometimes without, and it is a hit. The red pepper sauce is delicious, with many flavors layered upon one another, and the real kicker is the harissa paste. Also, I have tons of bell peppers in the freezer from the CSA so finding this recipe was a bonus for me. 

Harissa Paste in tube

I had never purchased or used harissa until now, and I am intrigued.  was very glad that this recipe pushed me out of my comfort zone and exposed me to this new ingredient – spicy, smoky, colorful. All good.  Harissa comes in a tube or glass jar. And, WARNING! The level of spiciness can vary dramatically. I speak from experience. Have you used harissa?

The accompaniment, Chickpeas with Leeks, Spinach and Smoked Paprika, is also a great stand-alone dish. It takes about 10 minutes to prepare, is high-protein, vitamin-packed and flavorful. I enjoyed leftovers for lunch the next day and have prepared it for a quick meal without the Poached Eggs dish. I did make a few modifications to these recipes. Hubs is not a fan of poached eggs, so we substituted scrambled eggs and it worked. He seemed to enjoy his meal as much as I did, even without the richness of the poached egg’s yolk mixing with the spicy peppers. Hubs also seemed to enjoy the meal without the accompanying Chickpeas, as that remains a verboten food. Hubs was a good sport about the Cleanse overall, but apparently there are limits. See my modified recipe below.

Eggs with Tunisian Red Pepper Sauce (adapted from Bon Appetit)

  • 2 tablespoons olive oil
  • 1/2 medium red onion, chopped
  • 2 garlic cloves, finely chopped
  • 2 red bell peppers, cored, cut lengthwise into 1/2”-wide strips
  • 1  teaspoon kosher salt, divided, plus more for seasoning
  • 1  tomato, cored, grated using the large holes on a box grater
  • 1/2 tablespoon (or more) harissa paste (taste for level of desired heat)
  • 4 large eggs
  • 1 teaspoon white wine vinegar or apple cider vinegar (if poaching eggs)
  • Flaky sea salt, such as Maldon

Preparation

  • Heat oil in a large skillet over medium heat. Add onion and cook, stirring often, until softened, about 5 minutes. Add garlic; stir until fragrant, about 1 minute. Add peppers and 1 tsp. kosher salt and cook, stirring often, until peppers are wilted, 5—8 minutes. Add tomato, 1/2 Tbsp. harissa, and 1 cup water; reduce heat to medium-low and cook, stirring often and adding more water if too dry, until peppers are soft, 15—20 minutes. Season with kosher salt and more harissa, if desired. Keep warm.
  • Meanwhile, fill a large skillet with water if poaching eggs. Add vinegar and 1/2 tsp. kosher salt; bring to a simmer. Crack each egg into a teacup, then slide each one into the water; reduce heat to low. Poach eggs until whites are set and yolks are gently set, 3—4 minutes. Alternately, prepare scrambled eggs as you normally would in place of the poached eggs (no vinegar needed).
  • Divide pepper sauce among four warm bowls and top each with 2  poached eggs, or divide scrambled eggs. Season eggs with flaky sea salt.

Yield: 2 servings

Happy eating!

Cleanse This: My So-called Cleanse Experience

Who out there has tried a cleanse?

(I’ll bet a few of you nodded yes)

Who out there has THOUGHT about trying a cleanse?

(I bet many of you nodded yes and raised your hands to that question)

Green juice – not so appetizing

Cleansing has been an on and off topic in our household for at least a few years. We have fanatical friends who go on radical juice cleanses once a month (or so it seems) and family members who have committed to month-long “gentler” cleanses that include solid food and  smoothies galore, not to mention that a raw foods & fresh juice retailer opened  around the corner last year,  taunting us on a daily basis to give starvation a shot for the low price of $60 per day. All participants claim to feel fabulous afterwards: clearer skin, leaner waist lines, higher energy levels. And despite all this, I’ve shied away from it. Until…

I read about Bon Appetit’s Food Lover’s Cleanse. I fell for it hook, line and sinker over the winter holidays as I overindulged meal after meal, and gluttonously flipped through the magazine in my limited time away from the table. The principles are simple: tons of fruit and vegetables, lots of whole grains and healthy fats,   limited caffeine and alcohol, and only natural sweeteners. 3 square meals + 2 snacks per day. It’s a non-cleanser’s cleanse. Sounds pretty good for 2 weeks, right? Here’s the tough part: no dairy, no refined bread, no pasta. For 2 weeks. Ouch. But, still, a heck of a lot better than all liquid, all the time for a week, right? That green juice scares me.

Black Cod with Swiss Chard, Olives, and Lemon with Red Quinoa on the side (photo courtesy of Bon Appetit)

The magazine hooked me on Day #1’s recipe for Cod with Swiss Chard and Red Quinoa with Pistachios.  Doesn’t sound like a painful meal to consume to me. The rest of the recipes were online, along with a shopping list to help plan your meals. Hubs and I discussed, and he agreed to commit. We decided to give it a whirl, and roughly followed the plan for about 2 weeks. I know, that sounds pretty loosy-goosy, but it was a start. I probably prepared about a dozen recipes altogether from the 14 day Cleanse (thank you author Sara Dickerman), several of which I have repeated (voluntarily) since, and a few that are now permanent additions to my repertoire. I’ll be writing about these new additions in upcoming posts.

Few other comments on the Cleanse: This is not a raid-your-pantry undertaking. Quite a bit of shopping was required, which I found to be a pro and con. The cleanse took me out of my comfort zone cooking-wise, incorporating quite a few new ingredients like harissa, red quinoa, hazelnuts (who buys hazelnuts on a regular basis?), but that was also fun. From a time investment, many of the dinner recipes were time-consuming. As a huge fan of the Minimalist, Mark Bittman, I like simple meals and some of the dinner recommendations were complex, and took a lot of prep. Hubs reminded me that the plan didn’t portend to be “fast and easy weeknight recipes,” but I still thought it worth mentioning.

In the meantime, a few words about the teaser recipe that got me hooked – Black Cod with Swiss Chard and Red Quinoa.  Delicious! What a satisfying and flavorful meal – Hubs even tasted the swiss chard. I tried a few substitutes for black cod, since it is hard to come by – regular cod, sea bass. All worked fine. And the Red Quinoa with Pistachios recipe is just delicious. Red quinoa does taste different from your standard quinoa – it’s also more expensive and harder to find. This was my first dish with it and it’s worth a try.  I’ll post the recipe below for you as well. Hubs loved it, too,

Red Quinoa with Pistachios (adapted from Bon Appetit)

  • 1 tablespoon olive oil
  • 1 shallot, finely chopped
  • Kosher salt and freshly ground black pepper
  • 1 cup red quinoa, rinsed well in a fine-mesh sieve
  • 1 1/2 cups vegetable broth or water
  • 1/4 cup unsalted, shelled raw pistachios, chopped
  • 3 tablespoons chopped flat-leaf parsley
  • 1 tablespoon chopped fresh mint (I omitted as I didn’t have any on hand, and was delicious nonetheless)

Preparation

  • Heat oil in a medium saucepan over medium heat. Add shallot, season with salt and pepper, and cook, stirring occasionally, until soft, about 5 minutes. Add quinoa and cook, stirring frequently, until quinoa starts to toast and smell nutty, about 5 minutes. Add chicken broth and bring to a boil.
  • Stir in quinoa, reduce heat to low, cover, and simmer gently until quinoa is tender, 25-30 minutes (15 if using white quinoa). Remove pan from heat, fluff quinoa with a fork. Cover; let stand for 5 minutes.
  • Fold pistachios, parsley, and mint into quinoa. Season with salt and pepper.

Yield: 4 servings, or as a side dish for 2 with leftovers


Fermentation Frenzy

With the new year, I’ve been motivated to try a few new things: fermenting, healthy cleansing (read: no juices or starvation), and taking real food cooking to a new level. I’ll start on fermentation and why it’s piqued my interest.

Hubs and I started taking a liquid probiotic supplement every morning last fall. We both agreed that we felt better after taking it – helped to keep us balanced and the digestive tract functioning more smoothly. I became a fan and a repeat customer.  Two issues: it’s hard to find and pricey. Well, what’s in this magic elixir but the extract of fermented real foods? 

I found inspiration from many fellow bloggers in the real food community about fermenting:

And so I began last week. I started with lacto-fermentation, straining a container of whole milk plain yogurt and reserving the liquid that resulted (whey). Thanks to OhLardy! for the step-by-step instructions here. A fun by-product of this was ultra-rich homemade Greek yogurt, which I had for breakfast this week. With my homemade whey, I tried making sparkling orange juice – add a few tablespoons of whey to OJ for a probiotic rich drink. And then, I moved on to fermented coleslaw.

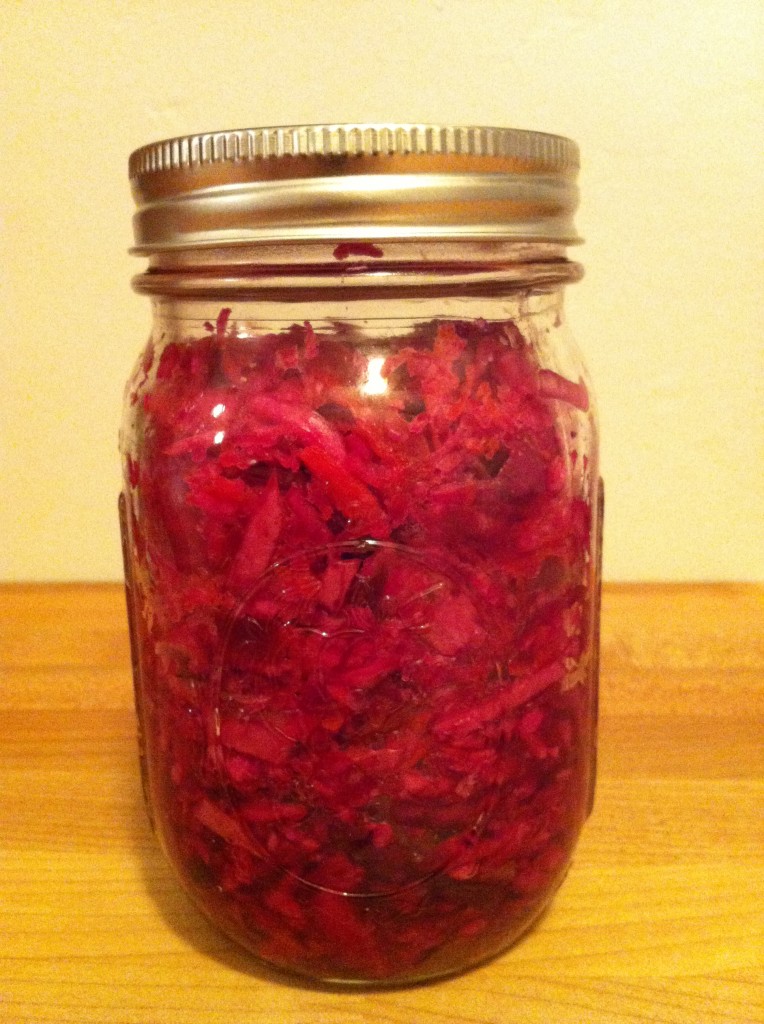
Red Cabbage Fermented Slaw

Red Cabbage Fermented Slaw

Red Cabbage Fermented Slaw

Red Cabbage Fermented Slaw

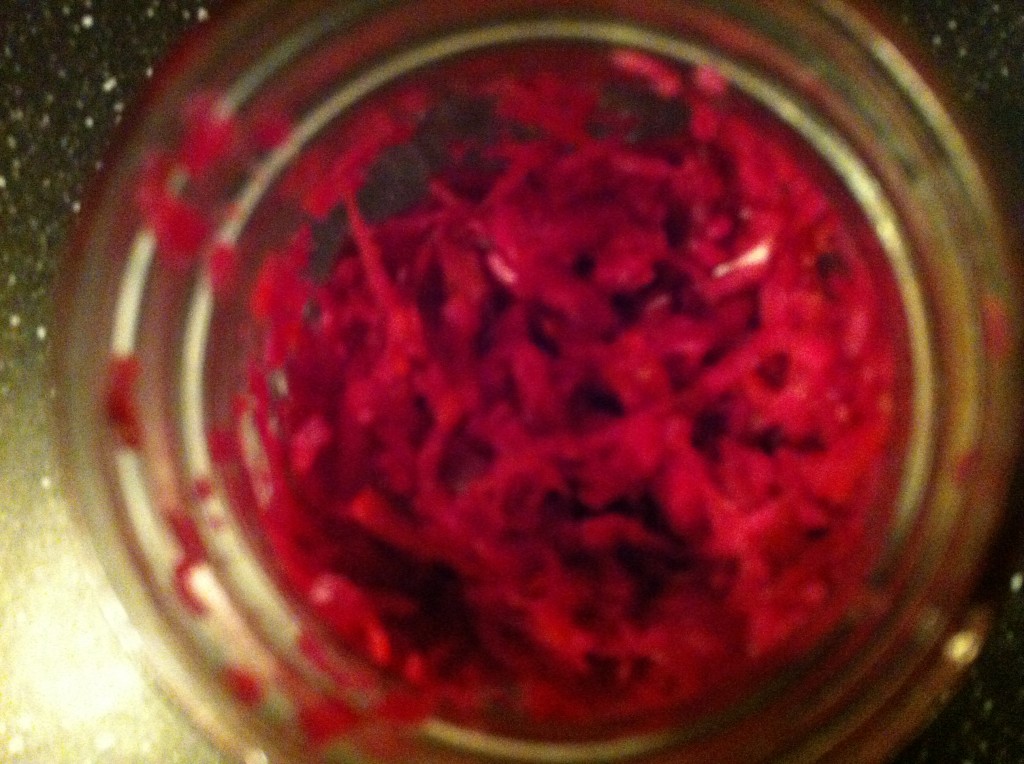
Roughly following the Fermenting Vegetables recipe from Feedmelikeyoumeanit, I made my first batch of slaw using salt as my fermenting agent. Super exciting. I used my Cuisinart to shred 1/2 head of purple cabbage and slice 1 whole yellow onion, grated 1 carrot by hand, and then used the equivalent of 1 sliced red bell pepper that I had “put up” over the summer from Wolfe Spring Farm‘s CSA. Felt like a regular homesteader, I did.

The recipe filled 2 – 1 pint Mason jars. After 2 days of rest, I carefully opened one jar to test it and tamp it down. As forewarned, open carefully! There are live cultures inside and pressure builds. The concoction bubbled up and spilled ruby-colored juice on the counter, but it needed a few more days to “cook.” I sealed the jars back up and left them alone. By day 5, we were ready. Shifted to the fridge, my fermented slaw was ready to go. Crunchy, salty, savory, I ate several forkfuls with my dinner last night and loved it. I can’t say that the digestive benefits were felt as immediately as with taking a supplement, but I knew I was eating something real and homemade.

Taste the goodness

Taste the goodness

Have you ever fermented?

Parker House Rolls Are a Hit

Epilogue on Parker House Rolls. Just what we needed for Thanksgiving dinner, another carb on the table, I thought to myself repeatedly, and voiced out loud  at least 1 or 2 times. But I am not too big to give credit where it is due and compliment Hubs on this last minute addition to the menu. The rolls created a few last minute scrambles like a missing 9X13 dish (had to swap out the homemade stuffing) and the equipment fumble (had to use Vodka bottle instead of rolling pin), but it was worth it. I was a doubter, and now I am a believer.

The rolls were rich and delicious and downright addictive. The Parker House rolls recipe we followed is from Bon Appetit. The good thing about having others help in the kitchen is that I can also capture their handiwork. Here is a video of Hubs lining up the individual rolls in the baking dish.  Did I mention that these make great leftovers, too?

Preparing Parker House Rolls

How Could I Forget the hors d’oeuvres?

With all the planning for Thanksgiving dinner, I almost forgot to map out what we’ll be snacking on while the turkey roasts. After a few emails and phone calls, we’ve settled on a few easy classics from Hubs’ family holidays:

  • Shrimp Cocktail (with Real Homemade Cocktail Sauce – recipe below)
  • Crudite’ and
  • Olives

Fortunately, we got these items inserted into the Google Doc in time to print the shopping list. And, a last minute addition to the main menu because you can never have too many carbs: homemade Parker House Rolls. The recipe in Bon Appetit called to Hubs.

Who could resist? I am biting my tongue about the calories and unhealthy ingredient list (whoops) for this recipe, but I won’t stop Hubs from pushing forward on this initiative.

Getting back to the hors d’oeuvres, let’s talk about Real Homemade Cocktail Sauce. I am a fan of homemade condiments overall, and if you have the time, it is worth it. Making your own cocktail sauce/mayo/spice mix will have an impact on the final result and often make an everyday dish outstanding. It’s like going from good to great in 5 minutes. We made this homemade Cocktail Sauce at Christmas a few years ago and it knocked our socks off. It’s hard to take prepared cocktail sauce seriously after tasting this. Recipe courtesy of Mark Bittman, of course.

Real, Homemade Cocktail Sauce 

  • 1 cup ketchup
  • 1 tablespoon lemon juice (or red wine vinegar if you don’t have any lemons)
  • 3 tablespoons butter
  • 2 tablespoons prepared horseradish, or to taste
Combine the ketchup, lemon juice (or vinegar), and butter in a small saucepan and cook over medium-low heat, stirring occasionally, until the butter melts. (At this point, you can keep the sauce warm for over an hour — but keep the heat as low as possible.) Add horseradish to taste. And done! Serve with shrimp and crackers.

Read More http://www.epicurious.com/recipes/food/views/Shrimp-with-Better-Cocktail-Sauce-105609#ixzz2Ci54B3KJ

Bye Bye Pepperidge Farm: DIY Stuffing Recipe Selected


Bye Bye: Pepperidge Farm Stuffing in a bag

First time ever: I will stray from my trusted Pepperidge Farm dry stuffing “foundation” in a bag. It is my family’s tradition – what my mom always made, and what I’ve made in recent years. Mind you, she always doctored it up significantly  sauteing carrots, celery, onion and mushrooms before adding the cubed bread mix. Strictly vegetarian, of course. So I am taking it to the next level this year and saying Bye Bye Pepperidge Farm and doin’ it from scratch.

I’ve been inspired by several recent articles online and in print to go my own way, as well as the From Scratch Club blog. I’ll follow the “Simple is Best” Dressing recipe by Sam Sifton from November’s Bon Appetit. It most closely mimics our old recipe – keeping it simple as the recipe title claims. Lots of fresh herbs. No sausage, no dried fruits, nothing fancy.

The recipe doesn’t seem like that much more effort than my old version, just a few additional steps and the need to remember to buy the bread in advance so you can let it go stale.

Please comment below if you make your own stuffing or dressing from scratch.

Take 2: No Knead Bread Revisited

One week later, I am back at it with the No Knead Bread. I followed Breadtopia‘s No Knead Bread recipe this go-round. Breadtopia’s recipe uses a little less water than Mark Bittman’s recipe, and since my original doughwas more batter than dough, I thought that would help.

Take 2: No Knead Bread

I also used a handful of whole wheat flour along with the all-purpose flour, just because I had it on hand. At the onset, the dough had more elasticity and body than my first batch. It seemed to rise more, too, during the overnight rising, and was easier to handle when turned out on the work surface. It was still very liquid-y, but I did manage to turn it onto itself.

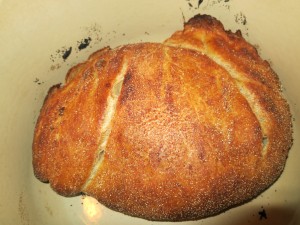
The final product looks great, but sadly is not much higher than my first batch. We may have the same low bread:crust ratio experienced previously.

Take 2: slightly more height on this loaf than the first attempt

I have reproduced the No Knead Bread recipe below, courtesy of Breadtopia.

3 cups bread flour
1/4 tsp. instant yeast
1 1/2 tsp. salt
1 1/2 cups purified or spring water

  • Mix together the dry ingredients.
  • Mix in water until the water is incorporated.
  • Cover with plastic and let sit 12-18 hours.
  • Follow video instruction for folding.
  • Cover loosely with plastic and rest for 15 minutes.
  • Transfer to well floured towel or proofing basket. Cover with towel and let rise about 1 1/2 hours.
  • Bake in covered La Cloche or Dutch oven preheated to 500 degrees for 30 minutes.
  • Remove cover; reduce heat to 450 degrees and bake an additional 15 minutes.
  • Let cool completely on rack.
  • Consume bread, be happy.